Mounting and Leveling a Digital Transit
- Place the tripod over the ground datum point and tighten the legs.
- Attach the instrument to the tripod and tighten snugly.
- Roughly level the instrument with the circular vial.
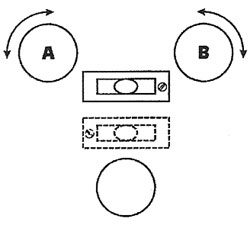
- Use level screws "A" and "B" to move the air bubble in the circular vial so it is centered left to right.
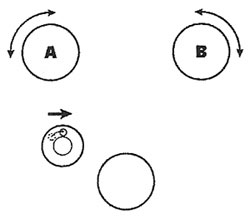
- Use level screw "C" to move the air bubble to the center of the vial.
- Fine tune the instrument with the plate level.
- Turn the instrument until the plate level is in either one of the positions shown. Then use the "A" and "B" level screws to center the bubble in the level.
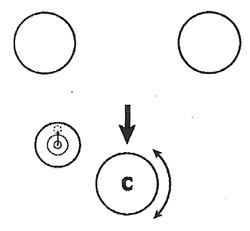
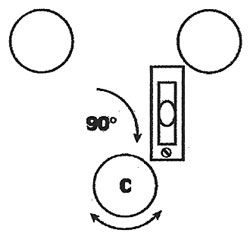
- Turn the instrument 90 degrees (100 g) and center the air bubble in the vial using level screw "C".
- Repeat steps A and B until the level stays centered in any direction. (If the plate level will not stay centered take the instrument in for service).
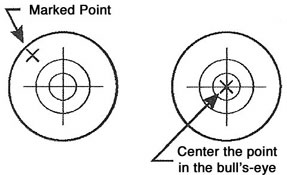
- Centering the instrument using the optical plummet adjustments.
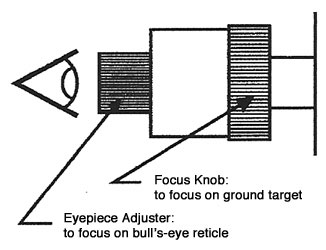
- Adjust the eyepiece so the bull's-eye reticule comes into sharp focus.
- Adjust focus knob so ground target comes into sharp focus.
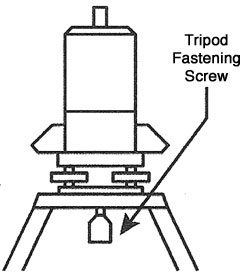
- Slightly loosen the tripod fastening screw and move the instrument until the ground target is centered in the optical plummet.
- Tighten the tripod fastening screw and re-check the level vials by following steps 3 and 4 again.
Telescope Eyepiece Focus
Point the telescope toward a bright area and turn the telescope eyepiece until the crosshairs come into sharp focus. Avoid parallax, the shifting seen between the target and the crosshairs when your eye moves while sighting through the telescope. Parallax will cause inaccurate measurements.
- Focus the telescope on a target.
- You should be able to move your eye up and down or left and right without seeing the target shift with respect to the crosshairs.
- If there is parallax, re-adjust the eyepiece.
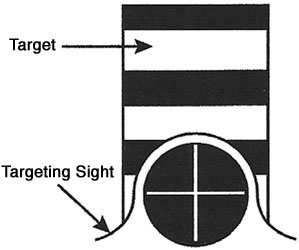
- Loosen the clamps and point at the target using the targeting sights located above the telescope body.
Note: Prior to setting your gun, make sure to check your battery power.
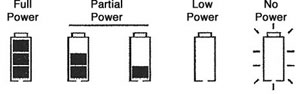
Battery operation will vary depending on make and operating temperature. Be sure to keep an extra battery pack on the job site.
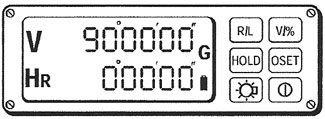
- Turn the power on. All segments of the display will light for a few seconds as a self test.
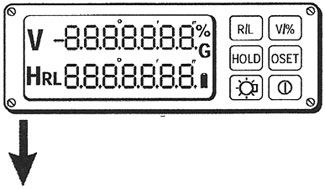
- The vertical reading will be shown as
 , which stands for "SET".
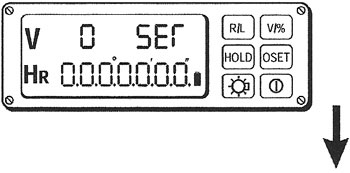
- Rotate the telescope to set the vertical "0" Point. This is done to cause the zero pointer to pass the sensor and start the vertical angle measurement.